Rubicon Crusader Painting

Last vehicle out of the newer Rubicons that I received recently. And quite a departure compared to the American ones cause this would be done up for my Canadians in Italy ( even if they never really used it or not ). So had to start from scratch on the color scheme. I had already painted up the Otters and AEC previously, but I wanted to try the technique I am using at the moment on this kit as well!

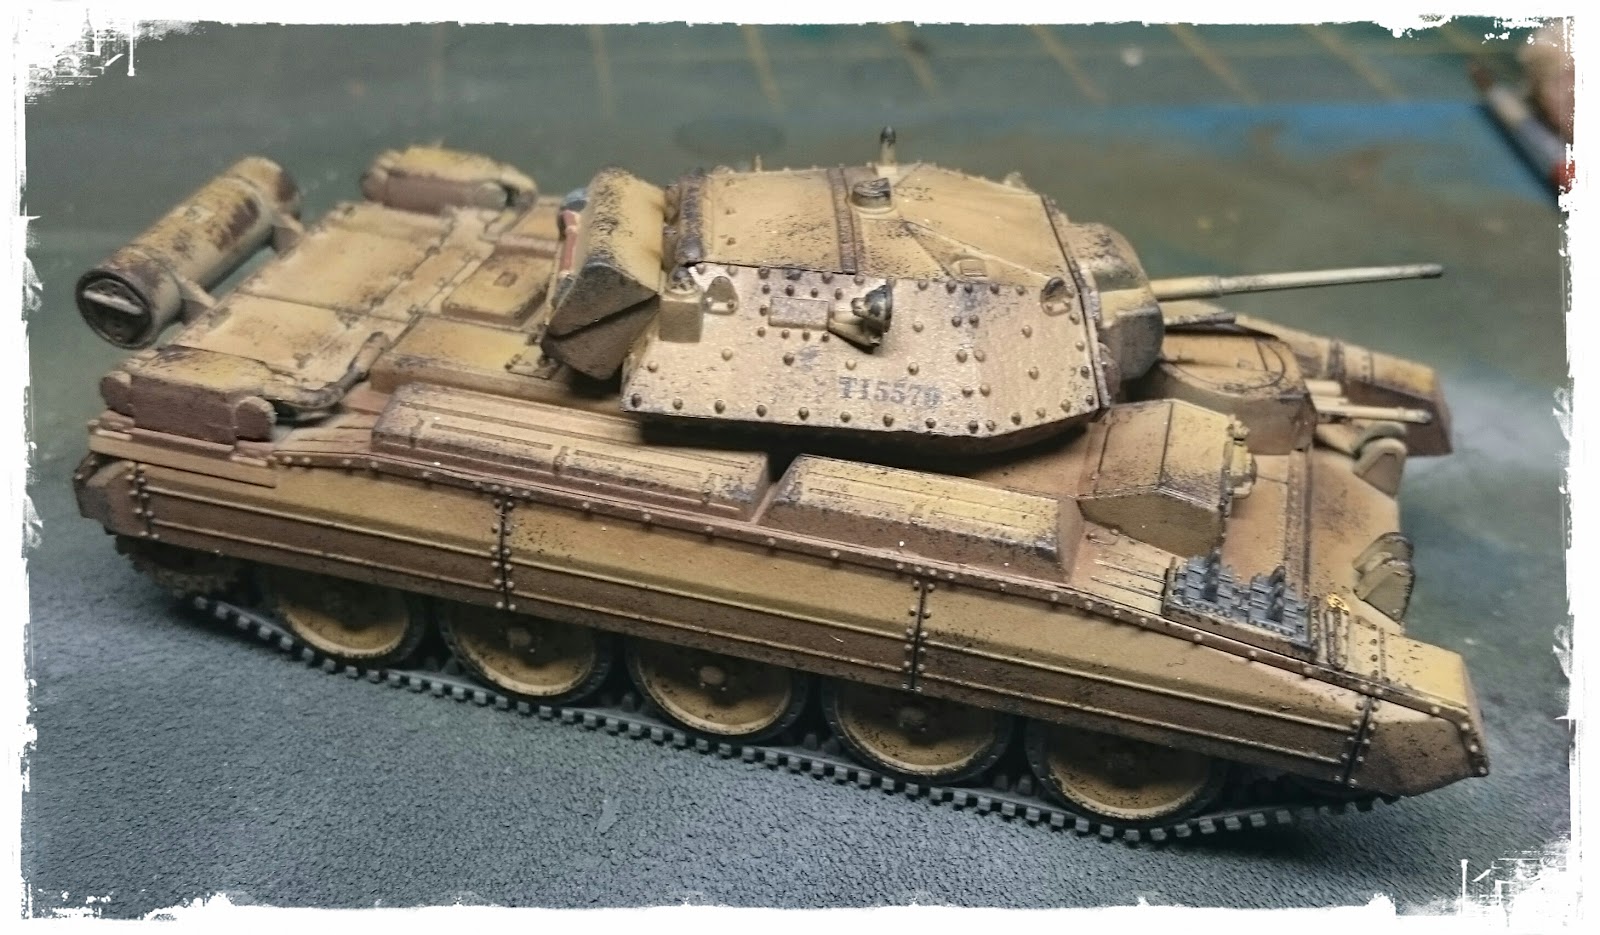
Not a lot of pieces here. Just the body, and then the 2 turrets that I had assembled already ( there is a third one, but I have not made it cause I messed up on the original ones ).

Here I tackled the piece with a brown undercarriage and lining on the tank panels. Then hitting up the flat sections with a more sand color. Was looking very flat at this time, and would experiment with some oil colors to brighten and spruce it up some.


I liked how much it smooths out the transition between the colors since my airbrushing skills are pretty lame. It also allows me to add a bit of color saturation to the model as well, or work on the contrast better especially on these more dry schemed tanks.

With some decals on, but pre-weathering and chipping.. and this will be interesting as I am not quite sure how to achieve it on such a piece without going overboard.

Once the gloss varnish was finished and dry I could tackle the weathering. Same steps are the Americans, but it really effected this one in a more dirty way than the others.
Chipping with the Brown, Black, and Metal colors again along with the torn up sponge piece. Once that was semi dry, I could go in with the Brown Enamel wash. Though I knew that I would put it into a few different locations and use it more for shadowing and contrast than just dirtying up the model. For the most part it worked out well. I have gone off to buy more Enamels to do up dust etc on the piece later on, but for now it works.
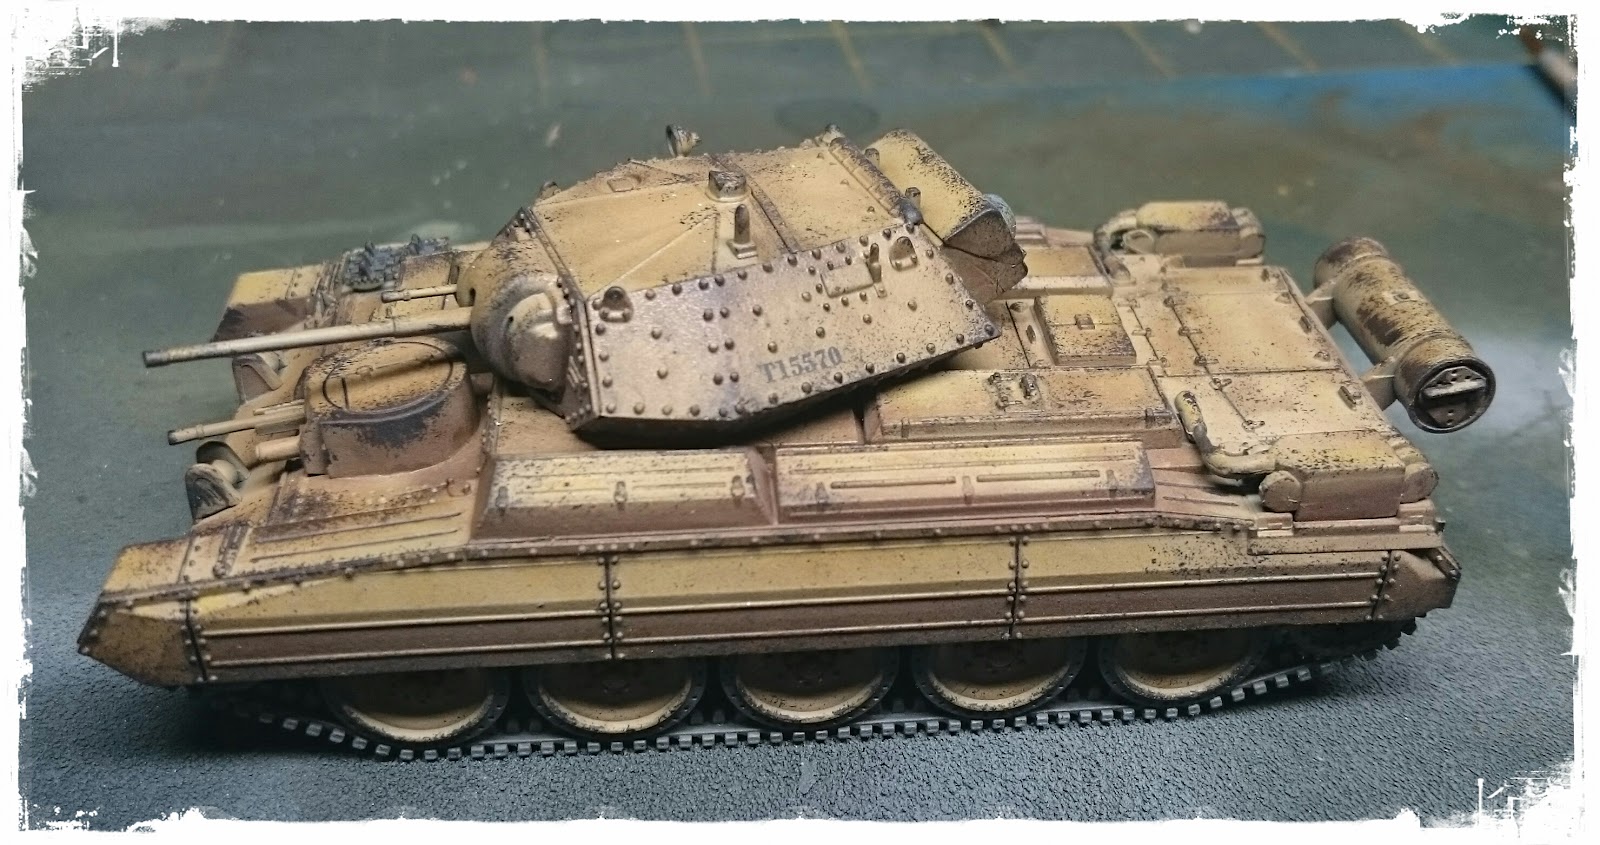
With the Turret on, it looks the business. I do wish I had put on the white lettering to make them show up more, or even the stripes on the sides to give it some sort of identity. It is feeling a bit underwhelming compared to the American ones with all the bling, however that might just speak volumes of the US vs Commonwealth armies.. just saying ;)
Above you can see the Crusader Mk I/II. Ran it on Tuesday to some great effect, which is to some point surprising. Only because of the superstitious nature that is gamers that anything that is freshly painted will normally die a horrible death in its first game. Born in blood comes to mind in that respect :) But he did fairly well overall, not taking any hits at all, and dishing out some serious hurt.
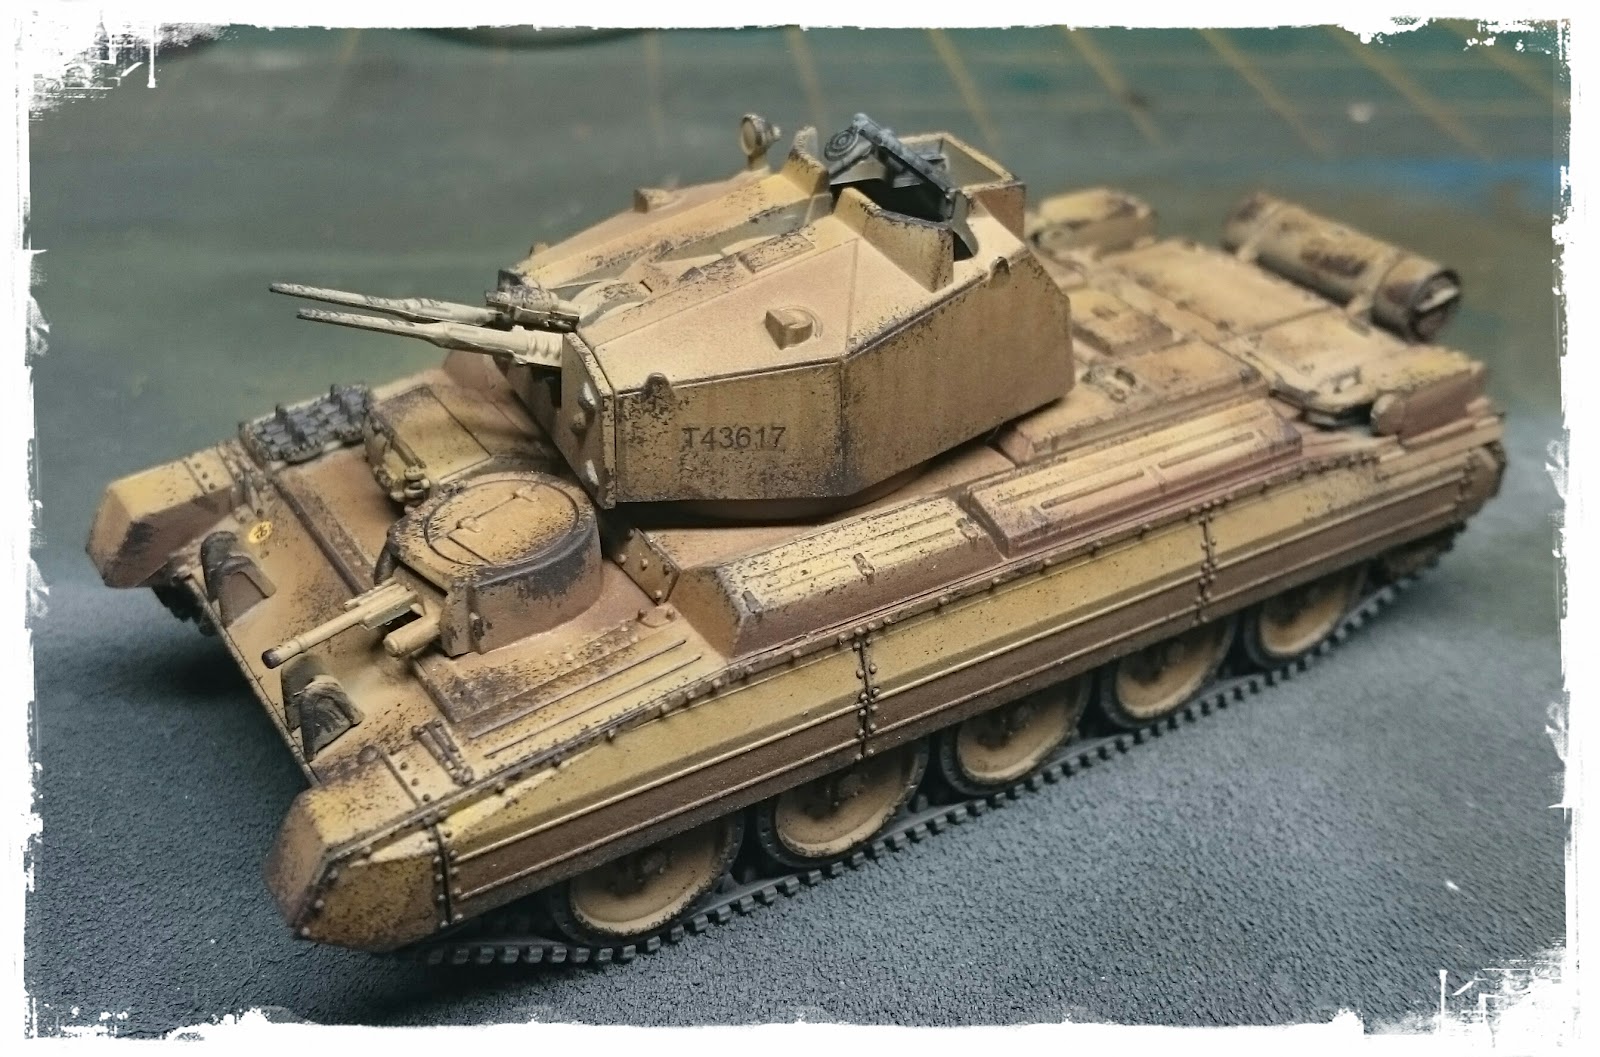

Am curious to try out the AA variant now which is easy to do with the swapping out of turrets. Seeing the turret it is more the Mk II here as it has 2 light autocannons compared to the Mk I which has a large autocannon instead. Though the front MMG turret is not available on it, so I will have to be cautious of that while playing ;) Reminding myself that it is just there for show, not for actual use.
Overall, I am really happy with this. I think I would do one more level of brightness for the armor itself before hitting it with weathering though. Just seems to be a bit dark on the table, and doesn't stand out as much as I would have liked. But as always, its a learning journey, and at the moment I am just happy to being motivated to paint once more! Enjoy the weekend!


It really does look the biz! One of my favourite tanks of yours so far!
ReplyDeleteThanks Clint. Am working on the 2 Warlord versions now.. but they will be a bit lighter in color as this only really looks good under my painting lamp, and not so much on the table.
DeleteVery good Sir, very god indeed.
ReplyDeleteThat looks just excellent!
ReplyDelete